Other Reflections of a Madman
| Travel Europe blog Computer Tips |
List of Translation
Agencies |
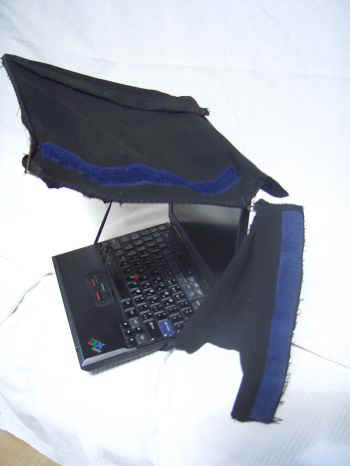
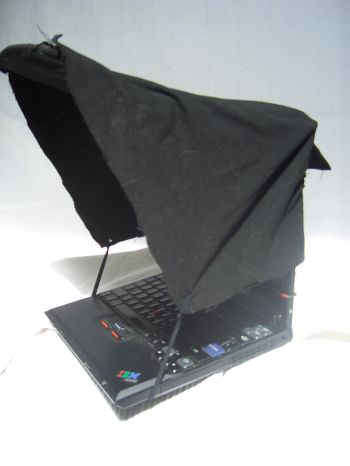
| I like to work outside occasionally but it can be difficult
to work on a laptop since the sun can make viewing the screen or monitor rather difficult.
At one point I designed a portable screen shade using balsam wood, cutting the parts to
fit and gluing them together, but one day it occurred to me that I could do the same thing
using bendable wire and dark cloth, which would be much better than wood since it would be
more flexible and portable. So I hired a little worker I had at the time to come up with
something, showing him what I had already designed with the wood. He measured my laptop
monitor or screen, took my wooden contraption to his cottage, and with a bit of help from
his grandpa, came up with the shade design you see on this page.
|
|
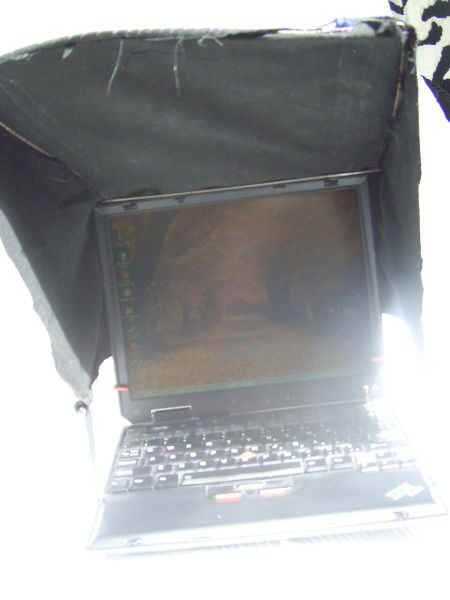
I suggested the velcro part to make it collapsible and portable, but I inadvertently discovered that this was not necessary because the shade contraption easily collapses on itself by spinning the ceiling part around the hinge, without having to disconnect the velcro parts. In any case, the velcro parts might prove handy at some point.
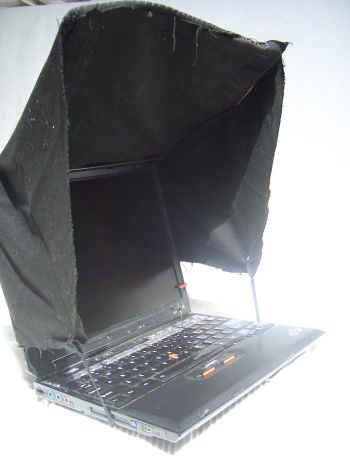
Basically, you want to get a strong wire which you can bend with pliers into the shape shown on these pictures, measured to your laptop or notebook monitor/screen, and sow on your thick black cloth/textile shade around that.
|
While in the textile shop you also buy the rubber stretchy
string they sell there and which is used, for example, to hold up underwear, and sow on
that elastic string so that you can slip it under the laptop to hold the side hanging
black shade cloths in place. Since one usually has their monitor tilted back as shown in
these pictures, I would suggest making the side black shade cloths larger. In any case,
the purpose of the side hanging shade cloths is to keep the sun out if it shines at an
angle, and the purpose of the elastic string is to keep the side hanging black shade
cloths from annoyingly flopping around due to any wind. You can make the ceiling project
out more (towards you) and the side shade cloths larger to create a darker cavity/chamber
above the keyboard, but I find the minimalist system set up by my faithful worker is quite
satisfactory. You want to make note of the angle you usually have your monitor set at, and
have the length of the elastic string just right, to make it tight enough to keep the side
hanging shades from flapping around, while not too tight so that it would force the
monitor to close shut a bit. If you want to get fancy, I suppose you can think up some
system to adjust the length of the elastic string. However, I find I never need to do
this, since the length of the elastic string is perfect, and everything holds wonderfully
in place. Below left you see a drawing of
how the bottom wire should look in the picture above it. |
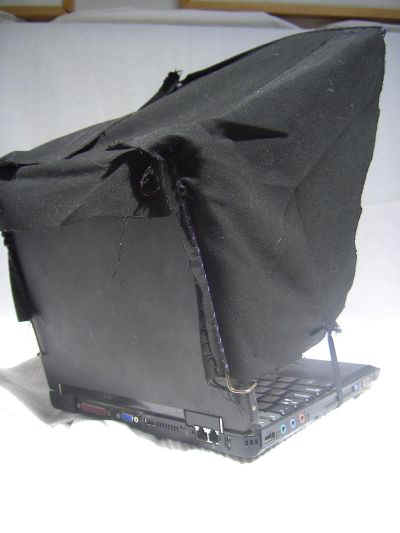
At the bottom you bend the wire so that it clips as shown around your monitor or computer screen, and you can slide on a rubber or plastic sleeve at the end, as I requested, to prevent the wire from scratching your prized notebook (although this too may be unnecessary, at least in my case, since my laptop shell is supposedly made from titanium).
Alternatively, when buying your wire from the electrical shop, you can buy one which already has a rubber coating on it. Just make sure that the wire is strong enough and does not bend easily. I made a duplicate of this sunscreen shade for another laptop but found it did not hold so well, I guess because the wire was not as strong and tended to bend out of shape due to the torque.
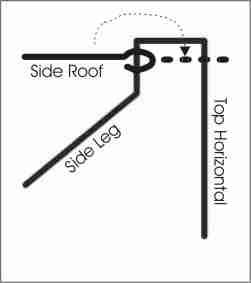
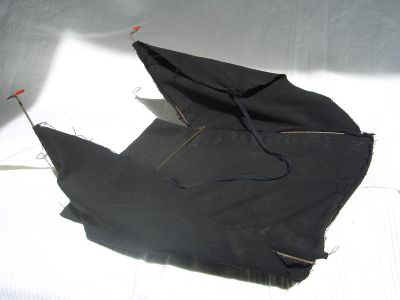
| The hinge mechanism and the way
it was supposed to prop up the roof part also did not hold well, since the wire for my
second monitor sun shade was not strong enough. Here you can see how the Top Horizontal section rests along the top of the monitor. In this state the laptop sun shade is fully open, so that the Side Roof section (with the loop on the end) of the picture above would be 180 degrees pointing in the opposite direction (along the dotted line). |
|
But once you bend the wire properly to shape, and have a strong enough wire, it should be a simple matter of sowing the cloth over top of that, and then sow on the elastic string once you have everything set up properly.
|
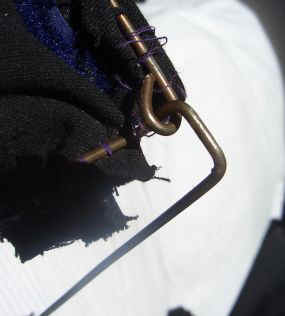
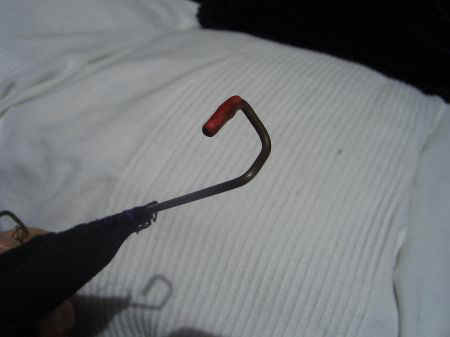
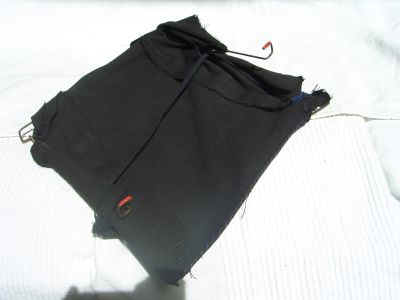
Top: The Clasp at the bottom of the
Side Leg, with rubber coating. |
You may have to experiment with the collapsible aspect of it as well. Mine simply spins around the hinges as shown in the pictures.
| Once set up and ready to go, you should be careful about
working too close to the ocean. When close to sea level and near to the ocean, there tends
to be a high concentration of salt in the air, which can get sucked into and over your
motherboard and internal parts through the laptop's fans. If your fan starts to get
clogged or seems to slow down, you can take apart your laptop and give it a good cleaning
with q-tips or a clean cloth, like when I took
apart my laptop. You can even use distilled water, or clean water, or some kind of
cleaning or hard alcohol, but prior to cleaning make sure you remove the batteries and
disconnect your notebook from the power supply, to avoid a short or electrocuting
yourself. You should also wait an hour or something in this disconnected state, as
electrical power may remain lingering in the various capacitors and which may damage
something if shorted. Just dampen the q-tips or cloth with a bit of water, wash the
various parts, and then dry immediately afterwards. You can do all this in direct
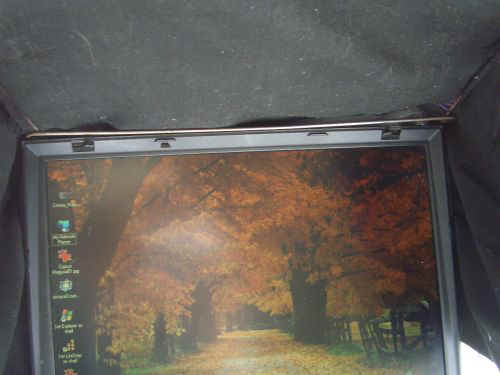
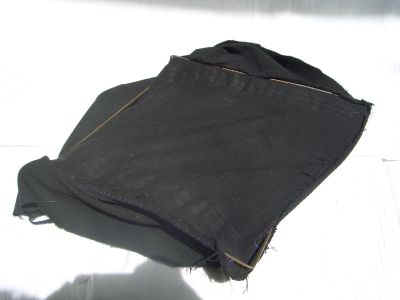
sunlight, for ample lighting and to make sure any wet parts immediately dry in the sun. View from the back, with Side Leg running up along side and behind the monitor, Clasp at bottom. |
|
When working outside, also keep in mind the sand from the beach, and make sure your laptop does not get too hot. For this it would be good to have a sunshade overtop, and I plan to make a table under the laptop with regular desktop computer fans installed within it, blowing upwards and cooling the belly of your prized notebook. I'll take pictures of this as well once it is up and running. The table would be more of a board which I could lay across my lap, or across the arm rests of my lawnchair. Something portable which I could use in different situations. These desktop fans all apparently operate on 12V, which is perfect for my caravan electrical setup.
When working outside you might also use different colour settings for your display, and save the different settings as part of your Windows Themes, so that you can switch back and forth quickly.
|
The Theme I like to use when inside is of a
dark green background overlaid by light yellow text. This is mostly because, when inside
(often under darker lighting), I find the standard black text over top of white background
can be rather glaring and hurt my eyes after a while. When outside, I like to use black
text overtop a light grey background. You can find more details about setting up computer
display colours through my translation
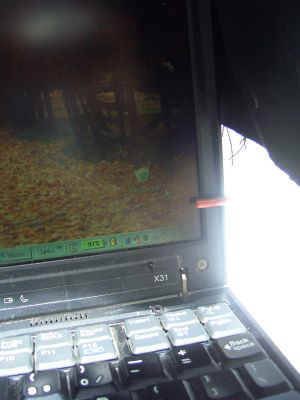
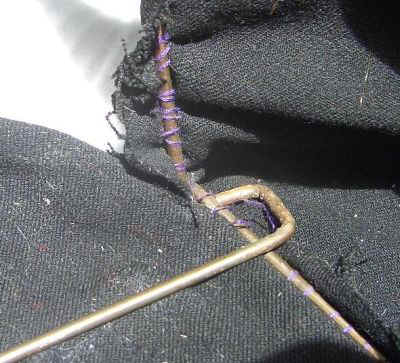
tips pages. Here is the inside view of the hinge mechanism, with roof lying on its back on the ground, with the Side Leg sticking up in the air and the Top Horizontal running to the bottom left of the picture and, in this case, resting on top of the Side Roof. The Loop Hinge connected to the Side Roof is buried from view. |
| When right side up (upside down from this picture), the Side Roof rests on top of the Top Horizontal, hence supporting the roof structure. | |
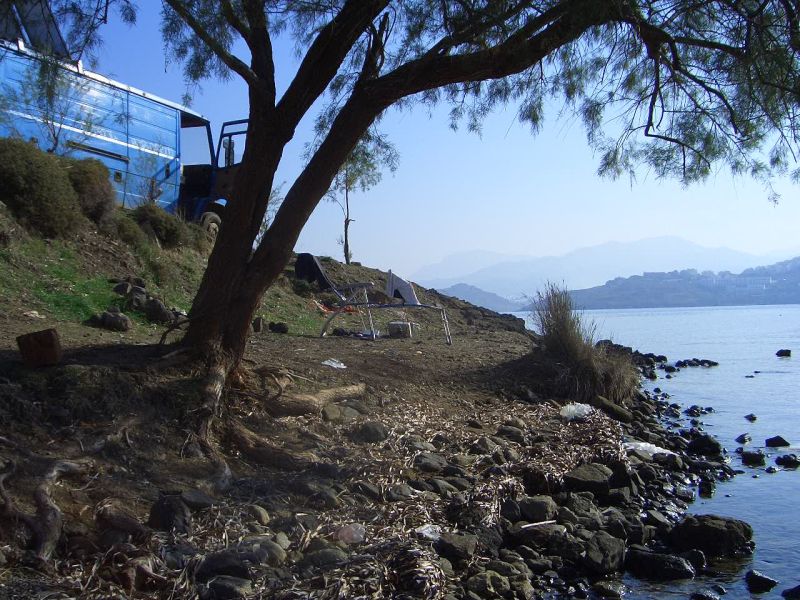
Here's a picture of my outdoor office in action, this picture in Yalikavak Turkey. A white t-shirt is draped over top to help keep the laptop cool, by reflecting the sun's rays.
You might find other useful and related ideas on my caravan survival tips pages.
Oh yes, and you'd probably want to wear a baseball cap, to keep the sun out of your eyes.
If this site helped your laptop from frying in the sun, a little donation would be really cool!
More pics:
|
|
|
|
Fully open, lying on its back. |
Flipped over, in closed position. |
|
|
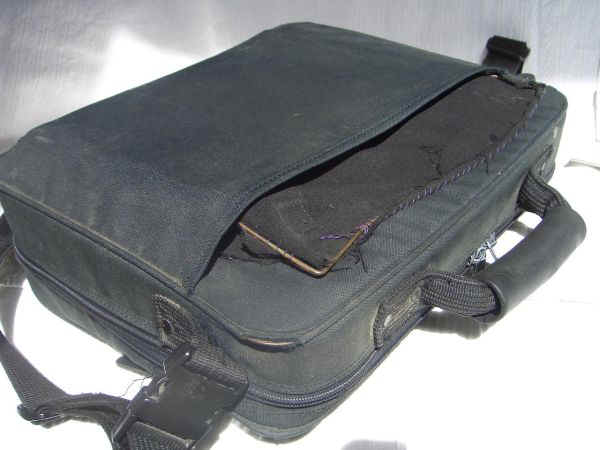
Tuck the ends in to clean it up,
and then slide it into your computer bag.
More of my Ideas