Portable Volleyball Net or Court
Surprised something like this is not mass produced, but easy enough to make
oneself.
Basically get a standard volleyball net, available in most sports
shops. Then you go to a hardware store and get four metal poles, where two of
them are smaller and can slide into the larger ones. Make sure they are long
(about 7 feet, or 2 metres) and strong enough so that they would overlap each
other in a sufficiently long enough middle section. You can also reinforce it by
putting a wooden cylinder into the inner pole.
|
When you are ready to set up, the inner pole slides out a certain
amount, such that the expanded length of the two poles match the official (or
desired) height of a volleyball net. At the bottom of the inner pole, you drill
a hole into the outer poles so that you can put a nail or something (I prefer a
screw with a wing nut) through that hole (going through opposite sides of the
outer pole), such that, when standing, the inner pole rests on top of this
horizontal nail, and the combined length of the two poles is the right height.
The purpose of having two poles like this is to make it easily portable,
otherwise a single pole would be too long to carry around practically. The
collapsed ones I made were a little taller than I was, or what I happened to
find in the hardware store.
Into the centre at the top of the inner pole I put a metal hook
screwed into a plastic sleeve which slid into the pole and held the hook into
place. All these things you should be able to find in a half decent hardware
store.
|

|
The hooks hold the wire or rope holding up the net.
Through these hooks you also loop thin climbing rope. The two
halves of the single climbing rope on each hook/pole would go down to the
ground, each jutting at about 30 degrees from the centre axis, and towards the
ground towards large tent pegs, which you can hammer into the ground using a
rock, or carry with you a hammer. One end of the rope would have that metal
thing they use for tent ropes to slide the rope and tighten it to your liking.
This should be available at the sports store where you bought the climbing rope.
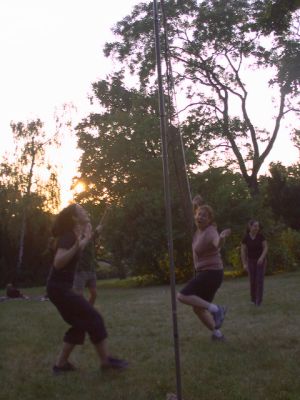
With this set up on both poles, the tent pegs obviously away from
the centre of the net, you can tighten the rope well enough that it holds quite
tightly (so the tent does not sag in the middle and so that the ball bounces
correctly when slammed into the net, as it should). For the part of the rope
going through the hook, I like to loop it around once or something, otherwise
the net keeps shifting away from the centre every time someone hits into it. You
don’t have to tie a knot, but looping it around once usually creates enough
friction to make it difficult to shift, while having some give to move around to
liking.
|
The string at the bottom of the net you can tie to the poles, but
not too tight, otherwise the poles might break. Just be careful and I found it
held without breaking, for several years (still going strong). People should be
careful not to smash into the net too much.
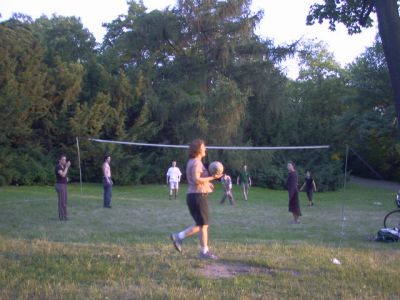
Now that the net is standing and tight, time for the court
boundaries, without which people will be arguing endlessly (we played that, if
the string moved, it meant it was in – easily visible and anything to keep
people from arguing). For this I got an empty plastic 1.5L bottle, so that I
could quickly wind some string around it. Otherwise the string that you use for
the boundary gets easily knotted up and you can spend a frustrating 30 minutes
every time trying to unravel the mess.
The free end of the white and easily visible string you make into a
loop knot, through which you can stick one of the poles. It lies on the ground
and holds one end of the boundary. I found the bottoms of the poles held well,
but if you want to get fancy, I guess you could put some sharp spike or
something jutting out the bottom of the outer pole, and pierce that into the
ground, but then you have to worry about hurting someone when carrying your
contraption around.
|

|
You then have a second string which you use for measuring, and I
like to use a right angle ruler, otherwise you can expect to listen to endless
arguing how the court is at an angle. I like to tie several knots in the string,
usually three, so I can use it to measure out the court. One of the knots is
used to measure the length between the poles, which you will use to measure the
width of the court at the back ends. The other two knots I use to measure the
length of the court away from the net, and I like to use two for this, because I
like to adjust the court size depending on how many people are playing. You can
have more than two knots, obviously, and this is a matter you can use for your
own liking.
So you take your right angle ruler and create a 90 degree angle
using the bottom string under the net as reference. You hold your measuring
string to the pole, while the second person walks away from you/the pole towards
the first corner of the court. Once they walk out far enough (to the knot in
your measuring string that you chose depending on how many people will be
playing), and after confirming that it is at a perfect 90 degrees from the net
string, you both lower the string to the ground, and at that point your helper
puts in the corner piece.
|
For a corner piece I used a plastic beer cup, which I cut up along
the sides, so that plastic strips spread out from the bottom. Through the centre
of the bottom I pierced a nail, and that nail I would then pierce into the
ground, such that the corners were clearly visible sort of star shaped white
things (if the ball hit the plastic stars, it meant it was in as well. Stop
arguing!). The white border string would go around the outside of the nail and
under the plastic cup. It was not tied in any way, and you can expect people to
trip over the string throughout the game, so it has to give.
Now you walk towards the first corner while your helper walks to
the second corner. This is where the first knot comes into play – the one which
should show the same length as the net (which should always be the same). Your
helper takes a guess about where the second corner should go (correct distance
from the first corner but guessing the distance from the other pole), at which
point you walk to the second pole, and you use the second not in the measuring
string to measure the exact distance from the second pole (maintaining the
already established distance from the first corner).
|

|
You have thus successfully measured out the first half of the
court.
Now your helper walks to the third corner, again using the second
knot to measure out the correct distance of the third corner from the second
pole. The helper pulls tight on the border string so that it is straight, you
make sure that it is directly below the top part of the net (not the bottom of
the pole, which can vary), and pierce into the ground the third corner.
Now you walk back to the first pole while your helper walks to
where the fourth corner should be. Again you use the second knot in the
measuring string to make sure that the corner is the correct distance from the
pole, and you make sure that the string lying on the ground between the first
and last corners is straight, and directly underneath the top of the net. You
then pierce the fourth corner into the ground. You do not need to measure the
back length of the second half of the court if you used the right angle ruler,
if the length of the back of the first half was the same as the length the net,
and if the distance between the poles and the corners is always the same. And
the middle part directly below the top of the net. Simple geometry, actually.
|
Now you unravel the last of the border string from around your
plastic bottle, and let the bottle rest near the first pole. You can put a bit
of sand into the plastic bottle so that it doesn’t blow away etc. Make sure you
have enough string wrapped around the bottle to cover the largest sized court
you may want to use. If you will ever want a smaller court with a smaller amount
of players, simply leave some of the string wrapped around the bottle. The
border string should be loose around the outside of the corner nails and under
the plastic cups, so that if someone accidentally kicked into the string, which
is sure to happen, the bottle will simply move towards the corner and a player
only need to pull it back towards the pole.
Simple and genius, eh? With a reasonably good helper, I usually got
the net up within 15 to 20 minutes.
When you take it down, one person ravels up the border string and
deals with the corners. For the net, loosen the climbing ropes at the end and
let the poles fall to the ground so that they are parallel to one another.
Pull each end of each climbing rope so that the two halves are the
same distance away from the hook, and lay it on the ground.
|

|
Pick up one of the poles and carry it towards the other, dragging
the climbing rope behind. Lay that pole on top of the other so that they match
(already you should have taken out the screw and wing nut so that the poles are
short and back into one another. You can even drill another hole into the centre
pole to hold the two together, but I find that the outer poles tend to bend a
bit, such that, after the first game, when you slide the inner pole back into
the outer one, they hold together without a problem). Organise the climbing
ropes so that they are together and the same length (four halves), jutting away
from the poles.
Now the net should be laying on the ground, folded in half. Simply
walk to the other end and fold into half again, and then maybe half again, until
it is about half the length of the poles (shortened and slid into one another).
Then you simply lay the folded net over top of the poles, I then lift it up a
bit, and use the climbing rope to wrap around this combination, in the end tying
the net to the two (four) poles. Something light, not that long, and easy to
carry.
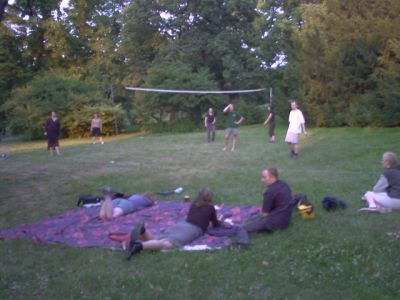
In my duffel bag where I would have my two volleyballs (one as
backup, or a cleaner whiter one for when it starts to get dark). I even had this
really big piece of textile which I used to use as a backdrop in the old days
when I had a photo studio and was taking pictures of models. That now became a
big blanket on which as many as 30 people could sit. Comfortably and not on some
wet or pea stained grass. Or an audience could lay out sprawled on it while
others played. Made for a perfect party, and everyone gathered on it between
games, while someone usually ended up rolling……………
This concept evolved over a period of about 7 years, always getting
better. Can be set up anywhere where the tent pegs will hold. Obviously, you
will want rather long and strong tent pegs, as people will always bang into the
net and you want it to hold well. Haven’t tried it on sand yet, but assume it
should hold if the pegs are long enough. The lazy and idle can scan out the
planned court area for dog turd while the organisers are setting up the net.
Enjoy!


